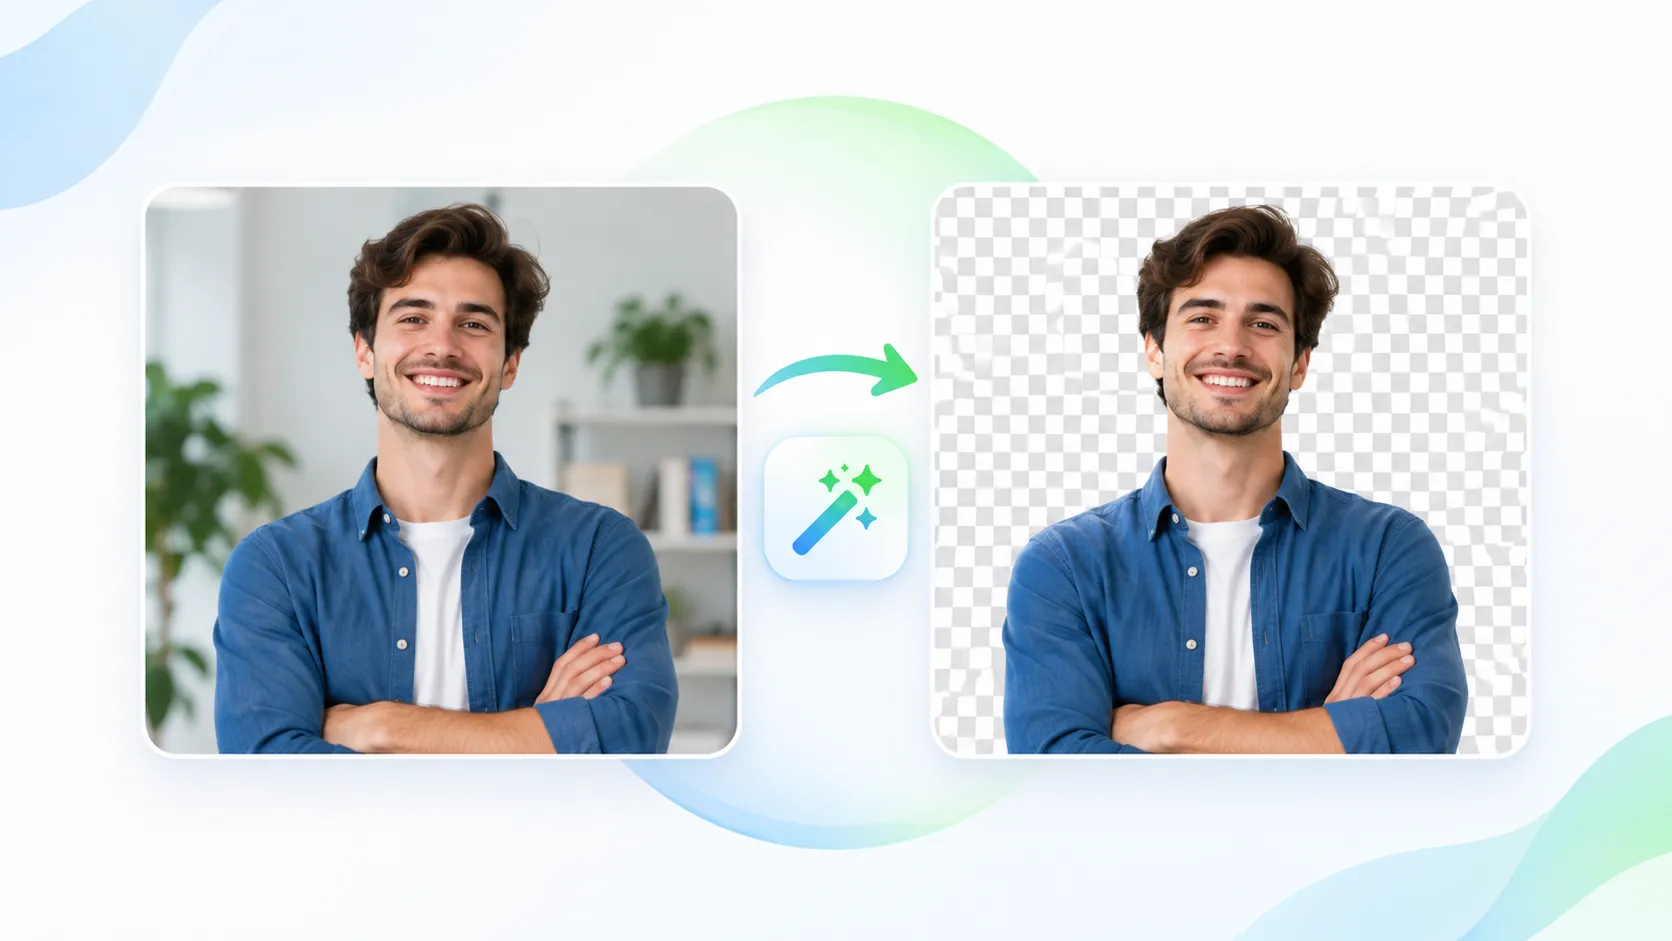
How to Remove a Background from an Image Online for Free
Whether you are preparing product photos for an online store, creating a clean profile picture, building a social media graphic, or cutting out a subject for a presentation, removing the background from an image is one of the most common image-editing tasks. The traditional approach required desktop software like Photoshop and manual selection tools. Today, browser-based AI background removers can handle the same task automatically — no installation, no signup, and no file uploads to a server.
This guide explains how background removal works, walks through the practical workflow, and covers the situations where automatic removal works well and where it struggles.
What Is Background Removal?
Background removal is the process of separating the foreground subject (a person, product, object, or logo) from the rest of the image and replacing the background with transparency. The result is typically exported as a PNG file, which is the standard format for preserving transparent areas.
The output is a cutout — just the subject on a transparent background — that can be placed on any new background, composited into a design, or used directly where a clean, isolated subject is needed.
How AI Background Removal Works
Modern AI background removers use machine-learning models trained on large datasets of images with labeled foreground and background regions. When you upload a photo, the model analyzes the image and generates a segmentation mask — a pixel-level map that identifies which areas belong to the subject and which belong to the background.
The process at a high level:
- The model examines the image and detects edges, shapes, and visual patterns.
- It classifies each pixel as foreground or background.
- Pixels classified as background are made transparent (their alpha channel is set to zero).
- The result is a cutout of the subject with a transparent background.
Browser-based implementations run this model directly in your browser using web-based machine-learning frameworks. The Image Editor uses this approach — the AI model loads in your browser, processes the image locally on your device, and produces a transparent PNG result without sending your file to any server.
How to Remove a Background from an Image Online
The workflow is straightforward:
- Open the Image Editor. Go to the Image Editor in your browser. No signup or account is required.
- Upload your image. Drag and drop or browse for your file. Supported input formats include JPG, PNG, WebP, HEIC (iPhone photos), and TIFF.
- Start the background removal. Select the background removal feature. The AI model processes the image directly in your browser.
- Review the result. Check the cutout for quality — inspect edges, fine details, and any areas where the background was not fully removed.
- Export as transparent PNG. Download the result as a PNG file. PNG preserves the transparent areas. JPG does not support transparency — transparent areas will be filled with a solid color (typically white). WebP can support transparency, but GeoImageTagger's AI Background Remover specifically outputs the result as a transparent PNG.
The entire process runs in your browser. Your image files never leave your device.
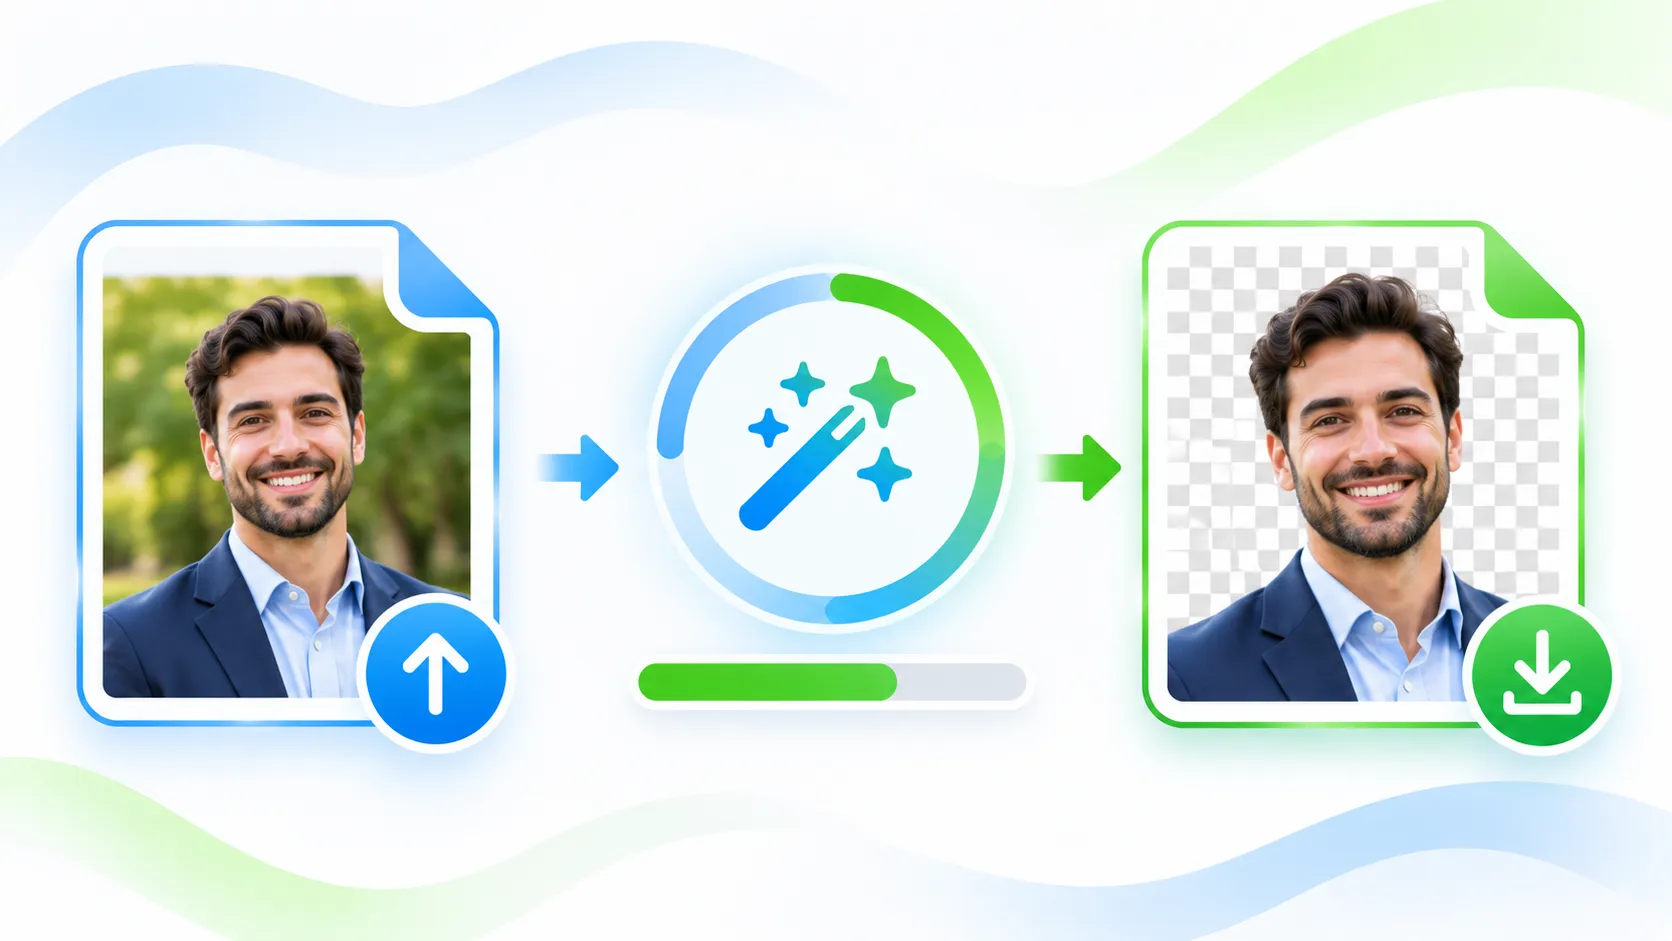 Step-by-step illustration showing the background removal workflow from uploading an image to AI processing to exporting a transparent PNG
Why Transparent PNG?
PNG (Portable Network Graphics) is a widely supported lossless format for preserving transparency. It supports an alpha channel — the layer that stores transparency information for each pixel — and is the documented output used by GeoImageTagger's background-removal workflow.
When you remove a background, the result has irregular edges where the subject meets the now-transparent area. PNG preserves these soft, anti-aliased edges at full quality.
JPG does not support transparency at all. If you export a background-removed image to JPG, the transparent areas become opaque (usually white). WebP supports transparency, but the GeoImageTagger AI Background Remover specifically produces a transparent PNG result.
Rule of thumb: Always export background-removed images as PNG first. If you later need a smaller file size for web use, you can compress the PNG with the Image Compressor or convert it to another format with the Image Converter.
Common Use Cases
Product Photography
E-commerce platforms and marketplaces often require product images on a white or transparent background. Background removal lets you photograph products in any setting, then isolate the product and place it on a clean background for listing images.
Profile Pictures and Headshots
Removing the background from a portrait creates a clean headshot that works on any platform — LinkedIn, company websites, ID badges, or social media profiles. After removing the background, you can crop the result to a circle or standard dimensions using the same Image Editor.
Social Media Graphics and Presentations
Cutout subjects can be placed on branded backgrounds, gradient fills, or alongside text for social media posts, stories, slides, and marketing materials.
Logos and Graphic Elements
If you have a logo on a solid background and need it on a transparent background, background removal is faster than manually tracing the shape. The result can be used as a watermark overlay, favicon, or design element.
When Automatic Background Removal Works Well
AI background removal produces the best results when:
- The subject has clear, well-defined edges — people, products, and objects against contrasting backgrounds
- There is good contrast between the subject and the background — a dark object on a light background, or vice versa
- The subject is in focus — sharp edges give the model clear boundaries to follow
- The image is well-lit — even lighting reduces ambiguous shadows and color blending
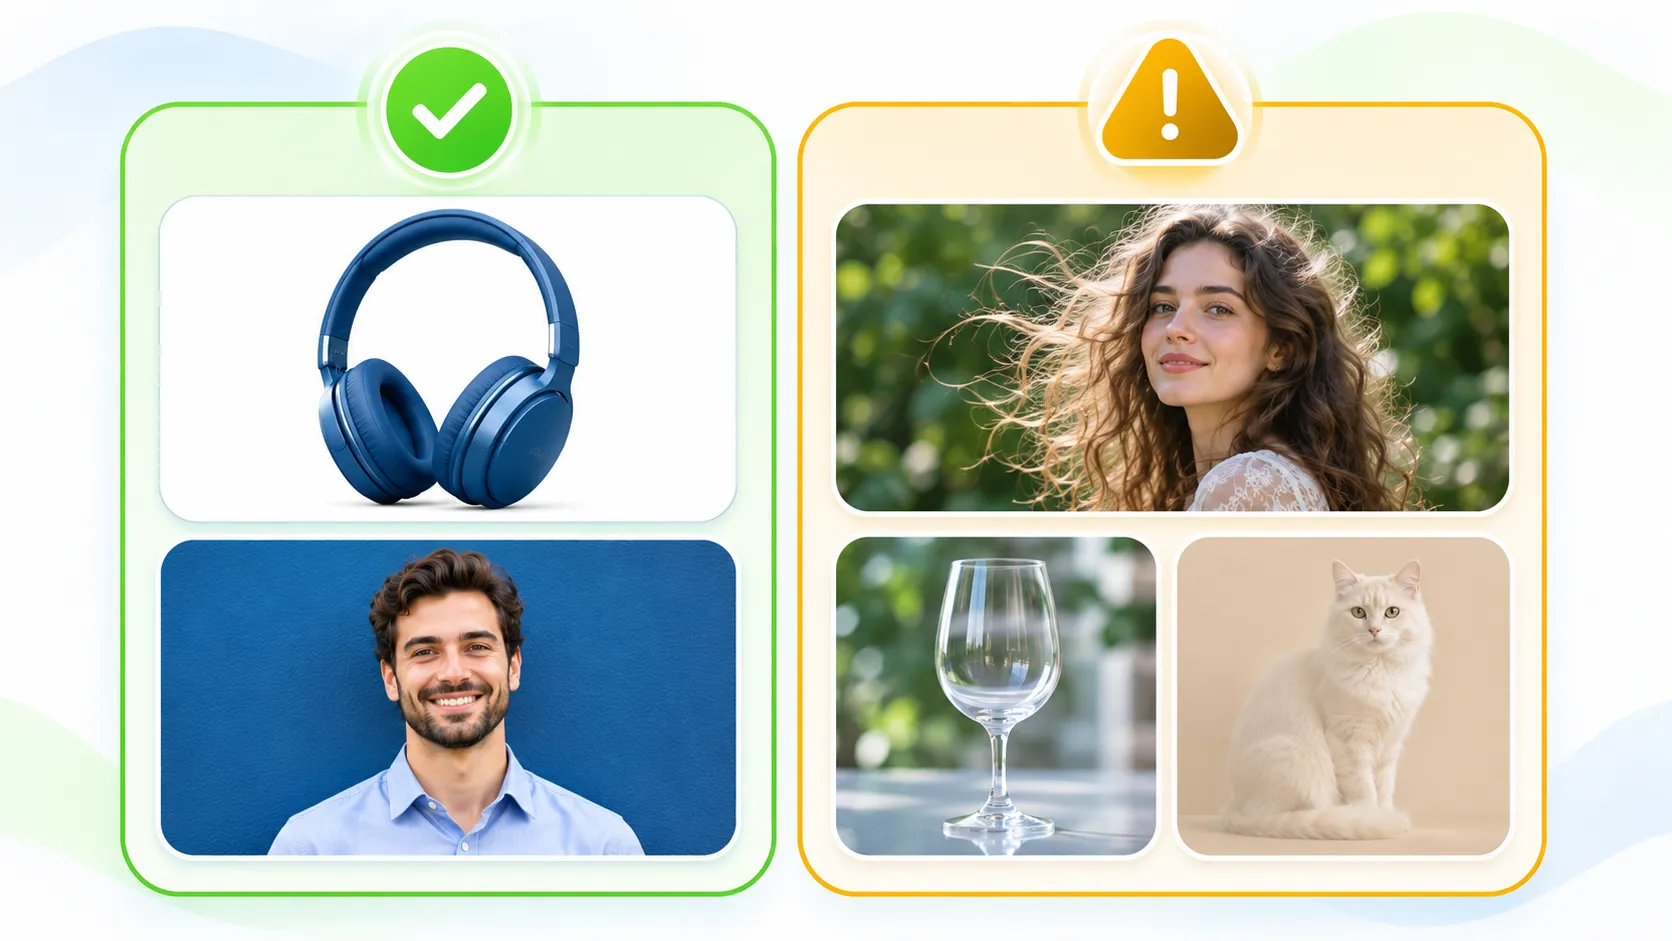 Side-by-side illustration comparing easy background removal cases with clear subject edges versus difficult cases with fine hair transparent objects and low contrast
Difficult Cases and Limitations
Automatic background removal is not perfect for every image. The quality of the result depends on the image content, subject boundaries, contrast, and fine details. Be aware of these challenging scenarios:
Fine Hair and Fur
Wispy hair strands, flyaway hairs, and animal fur are among the hardest elements for any background remover. Individual strands may be partially transparent or blended with the background. The AI model may clip some strands or leave background pixels around them.
Transparent and Reflective Objects
Glass, water, sunglasses, clear bottles, and other transparent or reflective objects blur the boundary between foreground and background. The model may struggle to determine which pixels belong to the object and which are visible through it.
Low Contrast Between Subject and Background
When the subject color is very similar to the background color — a white shirt on a white wall, or a green plant against green foliage — the model may fail to distinguish the boundary accurately.
Shadows and Semi-Transparent Edges
Drop shadows, soft shadows under products, and semi-transparent fabric edges exist in a gray area between foreground and background. These may be partially retained, partially removed, or produce uneven edges.
Motion Blur and Low Resolution
Blurred subjects or very low-resolution images provide fewer visual cues for the model to work with, resulting in rougher cutouts.
Practical tip: If your result has rough edges or missed areas, try using a higher-resolution source image with better lighting and more contrast between the subject and background. The quality of the input directly affects the quality of the output.
Background Removal vs. Cropping
Cropping and background removal are different operations:
- Cropping cuts the image to a rectangular area. It removes portions of the image from the edges but does not create transparency. The background remains intact.
- Background removal removes the background pixels and replaces them with transparency, preserving the subject's natural shape. The result is a non-rectangular cutout.
If you only need to trim white space or reframe the composition, cropping is the right tool. If you need to isolate the subject and place it on a new background, you need background removal.
What to Do After Removing the Background
Background removal is often one step in a larger workflow:
- Resize or crop the result to your target dimensions. The Image Editor includes crop, resize, and social media size presets for common platforms.
- Compress the file if the transparent PNG is too large for web use. The Image Compressor reduces file size while preserving transparency.
- Convert the format if you need a non-PNG output. The Image Converter handles conversions between JPG, PNG, and WebP. Note that converting to JPG removes transparency.
- Add a watermark if you want to protect the result before sharing. The Watermark Tool supports text, logo, signature, and hidden watermarks.
- Edit metadata if the exported image needs copyright information, descriptions, or other metadata fields. The Metadata Editor handles EXIF, IPTC, and XMP fields.
Privacy Considerations for Online Background Removers
When choosing a background remover, privacy is worth considering. Some online background removers use server-side processing, while others process images locally in the browser. If your images contain sensitive content — personal photos, confidential documents, proprietary product designs — it is worth understanding how a particular tool handles your files.
The Image Editor processes everything client-side in your browser. The AI model runs locally on your device, and your files never leave your browser. This is particularly relevant for professional photographers, businesses handling proprietary visuals, and anyone working with images they prefer to keep private.
Whether you need to remove the background from a product photo for your online store, create a transparent cutout for a design project, or prepare a clean profile picture, the Image Editor handles background removal directly in your browser — free, private, and with no signup required.
Explore all image tools at GeoImageTagger.
Frequently Asked Questions
Is the background remover free?
Yes. The background removal feature in the Image Editor is free to use with no signup, no account, and no usage limits.
Do my images get uploaded to a server?
No. The AI background removal model runs entirely in your browser. Your images are processed locally on your device and never sent to any server.
What image formats are supported?
Input: JPG, PNG, WebP, HEIC/HEIF, and TIFF. The background-removed result is exported as a transparent PNG. The general Image Editor also supports exporting in JPG or WebP, but JPG does not support transparency. WebP supports transparency, but the AI Background Remover specifically outputs a transparent PNG.
Can I remove the background from multiple images at once?
The Image Editor processes one image at a time. Upload each image individually, remove the background, and export the result.
Does background removal work on mobile devices?
Yes. The Image Editor works in modern mobile browsers including Safari on iOS and Chrome on Android. However, processing large or high-resolution images on mobile devices may be slower than on desktop due to device memory and processing power.
Will the background removal be perfect?
Results depend on the image content. Clear subjects with well-defined edges against contrasting backgrounds produce the best results. Fine hair, transparent objects, low contrast, and motion blur can result in imperfect edges. Using a higher-resolution source image with good lighting improves results.
← Back to Blog