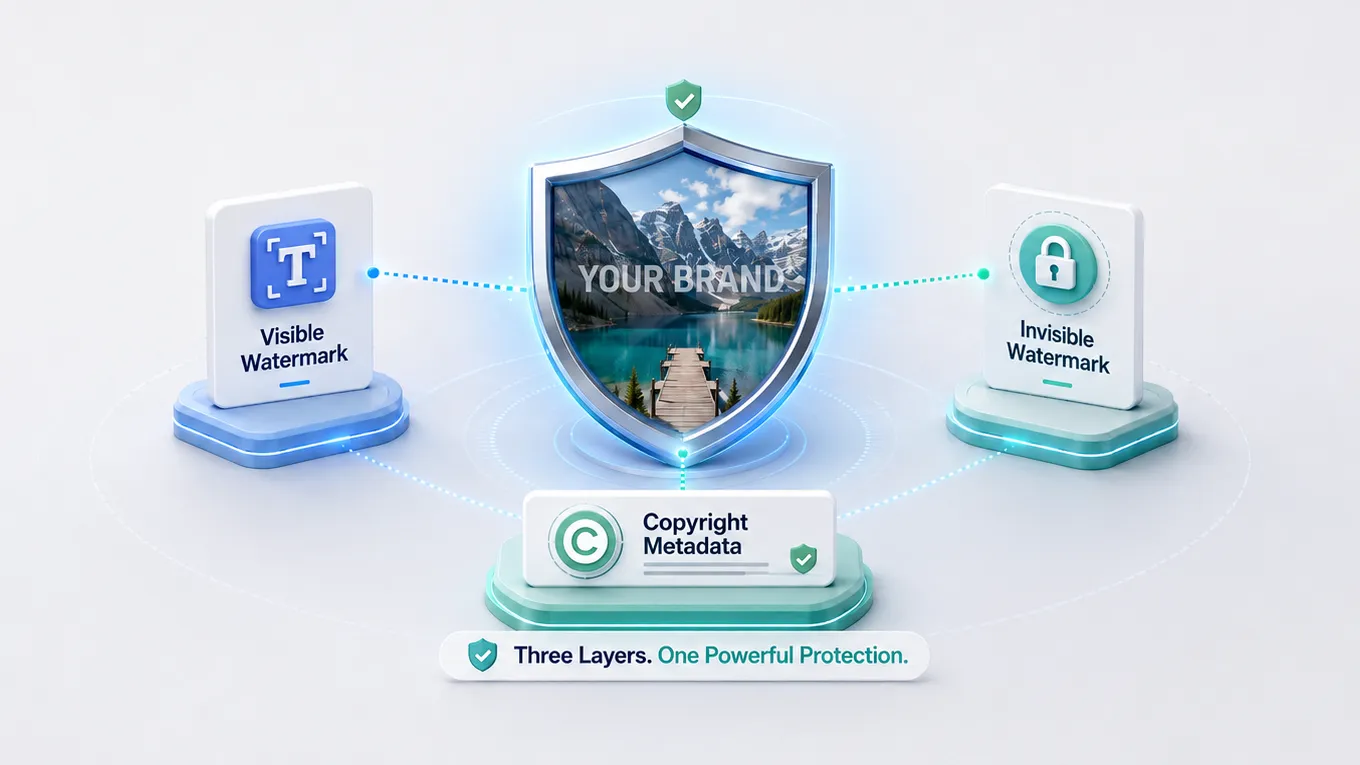
How to Protect Your Photos from Theft and Misuse Online
Every photographer, designer, and content creator has experienced it: you find your image on a website you have never heard of, used without permission, credit, or compensation. Image theft is not an edge case — it is the default reality of publishing visual content online.
The uncomfortable truth is that no single method can make your images completely theft-proof. If someone can see your image, they can screenshot it. But that does not mean protection is futile. The right combination of deterrents, embedded evidence, and enforcement tools makes unauthorized use significantly harder, easier to detect, and legally actionable.
This guide covers every practical layer of photo protection: visible watermarks, invisible steganographic watermarks, copyright metadata, DMCA enforcement, and the workflows that tie them together.
Why Photos Get Stolen
Understanding the threat helps you choose the right defenses.
Casual theft accounts for most unauthorized use. Someone finds your photo in Google Images, downloads it, and uses it on their blog, social media, or presentation without thinking about copyright. They are not malicious — they are careless.
Commercial theft is more deliberate. Businesses use your images in advertisements, product listings, or marketing materials to avoid paying for stock photography.
AI training is the newest threat. Web scrapers collect publicly available images to build training datasets for generative AI models. Your photos may end up influencing AI-generated images without your knowledge or consent.
Content repurposing involves reposting your images on social media, Pinterest boards, or aggregator sites — sometimes with your watermark cropped out.
Each type of theft calls for a different defense. Watermarks deter casual theft. Copyright metadata enables legal enforcement. Invisible watermarks prove ownership even after visible marks are removed.
Layer 1: Visible Watermarks
Visible watermarks are the most common and immediately effective deterrent. They place your name, logo, or copyright notice directly on the image where any viewer can see it.
Types of Visible Watermarks
Text watermarks overlay your name, brand, or copyright notice on the image. The Watermark Tool on GeoImageTagger offers full control over font, size, color, opacity, rotation, and position — plus advanced effects including gradient fills, curved text, shadow, glow, and outline. Bold and italic options are available for emphasis.
Logo watermarks use your brand logo or any image as a transparent overlay. Upload your logo in PNG, JPG, or WebP format, then adjust opacity, scale, and position. This is ideal for professional photographers and studios who want consistent brand presence across their portfolio.
Signature watermarks let you draw your actual handwritten signature directly on screen using mouse, stylus, or finger on touch devices. The signature pad supports pressure sensitivity and undo/redo. Your signature becomes a personal watermark layer with adjustable position and opacity — creating an authentic mark that is uniquely yours.
Tiled vs Single-Placement Watermarks
Single-placement watermarks sit in one position (corners, center, etc.) and can be cropped out relatively easily. Tiled watermarks repeat across the entire image in a grid pattern, making removal impractical without destroying the image content.
The Watermark Tool supports both modes. Tiled watermarks let you adjust spacing, rotation angle, and opacity to create a professional deterrent pattern while keeping the image viewable for evaluation purposes.
Best Practices for Visible Watermarks
- Opacity 25–50 percent — visible enough to deter, subtle enough not to ruin the image
- Place over complex areas — position watermarks over detailed textures, not blank sky or solid backgrounds (these are easier to edit out with AI inpainting)
- Use tiling for portfolio previews — covers the entire image so cropping cannot remove the mark
- Match your brand — consistent watermark style across your portfolio builds recognition
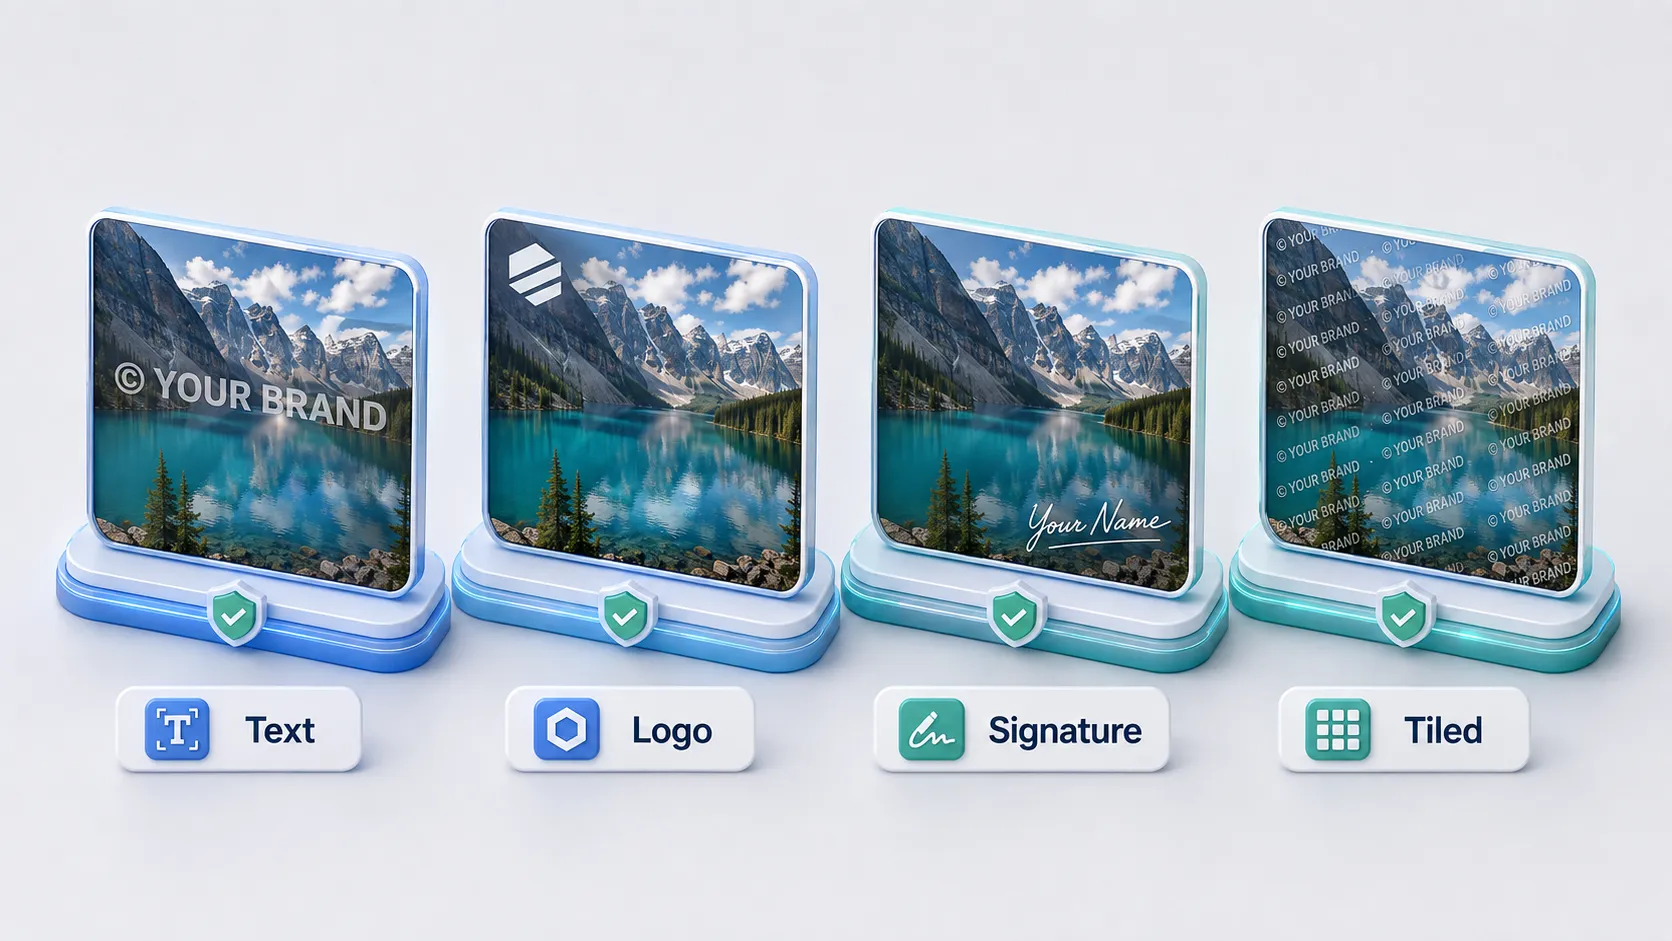 Four examples of watermark types showing text watermark logo watermark handwritten signature watermark and tiled repeat pattern watermark on sample photographs
Layer 2: Invisible Watermarks
Invisible watermarks embed hidden information directly into the image pixels. The watermark is imperceptible to the human eye but can be extracted later to prove ownership — even if someone removes the visible watermark.
How Steganographic Watermarking Works
Steganography hides data within the least significant bits of pixel values. Changing the least significant bit of a pixel's color channel produces a color shift so small that no human eye can detect it — but the encoded data can be read back by software.
The Watermark Tool on GeoImageTagger includes a steganographic watermarking system that uses red-channel LSB encoding with a structured format:
- Magic header for identification
- CRC-32 checksum for integrity verification
- UTF-8 payload — your copyright text, contact information, or any identifier
You type your hidden message (e.g., "© 2026 Jane Smith | jane@example.com | License #12345"), and the tool embeds it invisibly into the image. The built-in verifier can extract and display the hidden payload from any PNG file that was watermarked with the tool.
Important Limitations
Hidden watermarks only survive in lossless formats. The tool requires PNG export for steganographic watermarks because JPEG and WebP compression alters pixel values, which destroys the encoded data. If you plan to use invisible watermarks, always export as PNG.
Hidden watermarks also do not survive aggressive transformations like heavy cropping, resizing to very small dimensions, or re-encoding through social media platforms (which typically re-compress and resize all uploaded images).
The Dual-Layer Strategy
The most effective approach combines both visible and invisible watermarks:
- Add a visible text or logo watermark for immediate deterrence
- Add a hidden steganographic watermark with your copyright information
- If someone removes the visible watermark (via cropping or AI inpainting), the invisible watermark can still be extracted to prove ownership
This dual-layer strategy is what professional forensic watermarking services charge hundreds of dollars for. The Watermark Tool offers it for free, running entirely in your browser with no server uploads.
Layer 3: Copyright Metadata
Copyright metadata is embedded inside the image file as IPTC and XMP data. Unlike visible watermarks, metadata is invisible but machine-readable. Google reads IPTC copyright data and uses it for attribution labels in Google Images — displaying "Image may be subject to copyright" to viewers.
Key Copyright Fields to Set
- IPTC:Copyright — your copyright statement (e.g., "© 2026 Jane Smith. All rights reserved.")
- IPTC:Creator — your name or business name
- EXIF:Artist — the photographer
- XMP:Rights — usage terms and licensing information
- IPTC:Keywords — descriptive tags that help identify the image as yours
Use the Metadata Editor to add or update these fields. The editor modifies only metadata bytes — your image pixels remain untouched with zero quality loss. It supports batch processing for up to 5 images at once.
Why Metadata Alone Is Not Enough
Most social media platforms strip metadata from uploaded images. Facebook, Instagram, X/Twitter, and many others remove EXIF, IPTC, and XMP data during their upload processing. This means copyright metadata only persists when images are downloaded directly from your website or shared as original files.
That said, copyright metadata is still essential because:
- It creates a machine-readable ownership record on your own website
- Google Images reads IPTC data for attribution
- It serves as evidence in DMCA disputes
- It establishes a chain of ownership in your original files
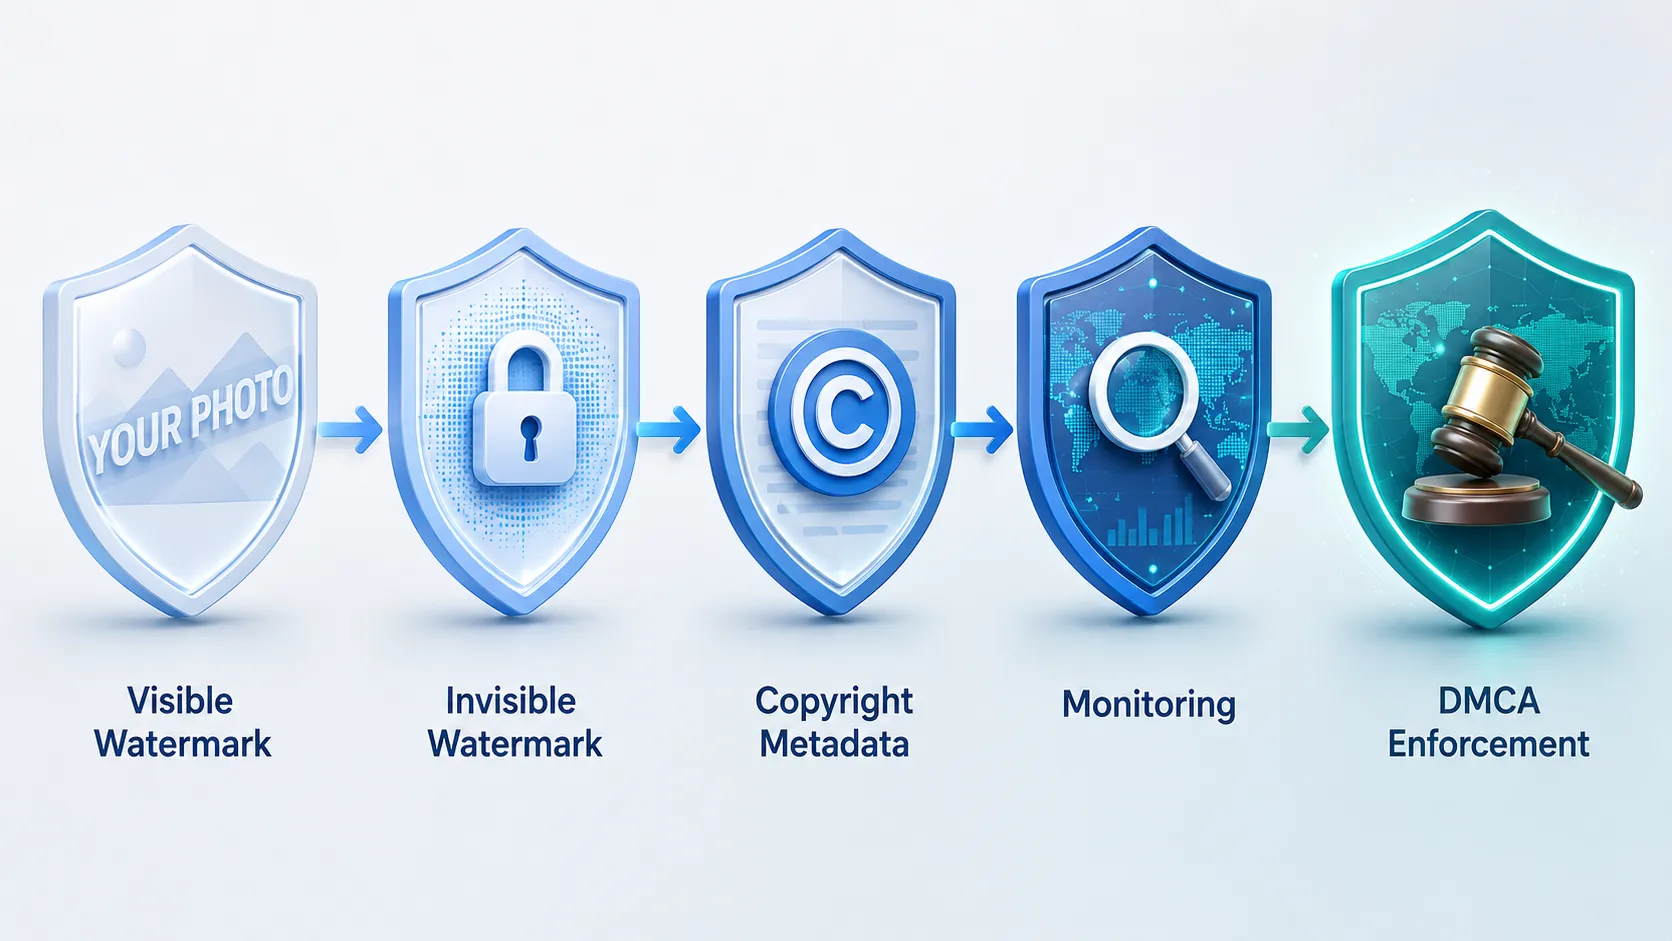 Diagram showing five layers of photo protection from visible watermark to invisible watermark to copyright metadata to monitoring to DMCA enforcement in a horizontal flow
Layer 4: PDF Document Protection
If you share proofs, portfolios, or client previews as PDFs, watermarking the document adds another protection layer.
The Watermark Tool supports multi-page PDF watermarking with text, logos, dates, and borders. A critical feature: the exported PDF preserves selectable text, clickable hyperlinks, and original page dimensions. There is no flattening or quality loss — your document remains fully functional.
This is particularly useful for:
- Client proof galleries with "PROOF" or "DRAFT" watermarks
- Confidential documents shared with partners
- Photography portfolios sent to potential clients
Layer 5: Monitoring and Enforcement
Protection does not end at deterrence. You need to actively monitor for unauthorized use and take action when you find it.
Reverse Image Search
Use these tools to find where your images appear online:
- Google Images — drag your image into the search bar or use the camera icon
- TinEye — dedicated reverse image search engine that tracks where your image has been indexed
- Copytrack — automated copyright monitoring service for professional photographers
Run reverse image searches at least monthly on your most valuable images.
DMCA Takedown Notices
If you find your image being used without permission on a U.S.-hosted website, the DMCA (Digital Millennium Copyright Act) takedown notice is your primary enforcement tool.
A DMCA notice must include:
- Your contact information (name, address, email, phone)
- Identification of the copyrighted work (your original image)
- Identification of the infringing material and its URL
- A statement that you have a good faith belief the use is not authorized
- A statement that the information is accurate, under penalty of perjury
- Your physical or electronic signature
Send the notice to the website's hosting provider or to the platform directly (most major platforms have dedicated DMCA submission forms).
Evidence That Strengthens Your Case
- Original RAW files with timestamps predating the infringement
- IPTC copyright metadata embedded in your published images
- Steganographic watermark extracted from the infringing copy (proving it came from your watermarked version)
- Copyright registration with your national copyright office
- Export history from editing software (Lightroom, Photoshop)
Complete Photo Protection Workflow
Here is a step-by-step workflow that combines all five layers:
- Start with your finished image — fully edited and ready for publishing
- Add copyright metadata — use the Metadata Editor to embed IPTC copyright, creator, and usage terms
- Add a visible watermark — use the Watermark Tool to add your text, logo, or signature
- Add an invisible watermark — embed a steganographic payload with your copyright details (export as PNG)
- Compress for web — use the Image Compressor with metadata preservation enabled to reduce file size
- Verify metadata survived — use the Metadata Viewer to confirm copyright fields are intact
- Publish — upload to your website
- Monitor — run monthly reverse image searches on your most valuable work
- Enforce — file DMCA takedowns when you find unauthorized use
For images you share on social media (where metadata gets stripped), the visible watermark becomes your primary protection. For images on your own website (where you control the file), copyright metadata and invisible watermarks provide deeper protection.
Frequently Asked Questions
Does watermarking reduce image quality?
For JPG and WebP exports, you control the quality slider — at 90 percent or higher, quality loss is minimal. PNG exports are completely lossless. The watermark is composited onto a full-resolution canvas, preserving the original image dimensions and detail.
What is the best watermark placement?
Place watermarks over complex, detailed areas of the image rather than blank sky or solid backgrounds. Complex areas are harder to reconstruct with AI inpainting tools. For maximum protection, use the tiling mode to cover the entire image with a repeated pattern.
Can invisible watermarks survive JPEG compression?
No. The steganographic watermark on GeoImageTagger uses red-channel LSB encoding, which requires lossless PNG format to preserve the encoded data. JPEG and WebP compression alters pixel values and will destroy the hidden payload. Always export steganographically watermarked images as PNG.
Do social media platforms strip watermarks?
Social media platforms strip metadata (EXIF, IPTC, XMP) during upload, but they do not remove visible watermarks — those are part of the pixel data. Invisible steganographic watermarks are typically destroyed because platforms re-encode and compress uploaded images.
How do I protect photos from AI scraping?
No single method fully prevents AI scraping, but you can make it less useful: watermark your images (visible marks may appear in AI-generated outputs, discouraging use), publish at reduced resolution (1200–2000px), embed copyright metadata, and use robots.txt directives to request that AI crawlers do not index your images. Some hosting platforms now support C2PA content credentials for provenance tracking.
Can someone remove a watermark with AI?
AI inpainting tools can remove simple, single-placement watermarks from blank or uniform backgrounds. They struggle significantly with watermarks placed over complex textures, tiled patterns that cover the entire image, and multiple overlapping watermark layers. Using tiled mode and complex placement makes AI removal impractical.
Is the Watermark Tool free?
Yes — completely free, with no signup, no usage limits, and no watermarks added by the tool itself. All features including text, logo, signature, hidden watermark, PDF watermarking, and tiling are available at no cost. Everything runs in your browser — your files are never uploaded to a server.
Conclusion
Photo protection is not about finding one perfect solution — it is about layering multiple defenses so that unauthorized use becomes harder, more detectable, and legally actionable.
Visible watermarks deter casual theft. Invisible steganographic watermarks provide proof of ownership that survives visible watermark removal. Copyright metadata creates a machine-readable ownership record that Google reads for attribution. DMCA takedowns provide legal enforcement when prevention fails.
The workflow is straightforward: embed copyright metadata, add visible and invisible watermarks, compress with metadata preservation, monitor for unauthorized use, and enforce your rights when needed. With browser-based tools on GeoImageTagger that handle every step, protecting your work takes minutes — and the cost of not doing it is your creative work being used without your knowledge, credit, or compensation.
← Back to Blog